Sugar Cookie Gnomes
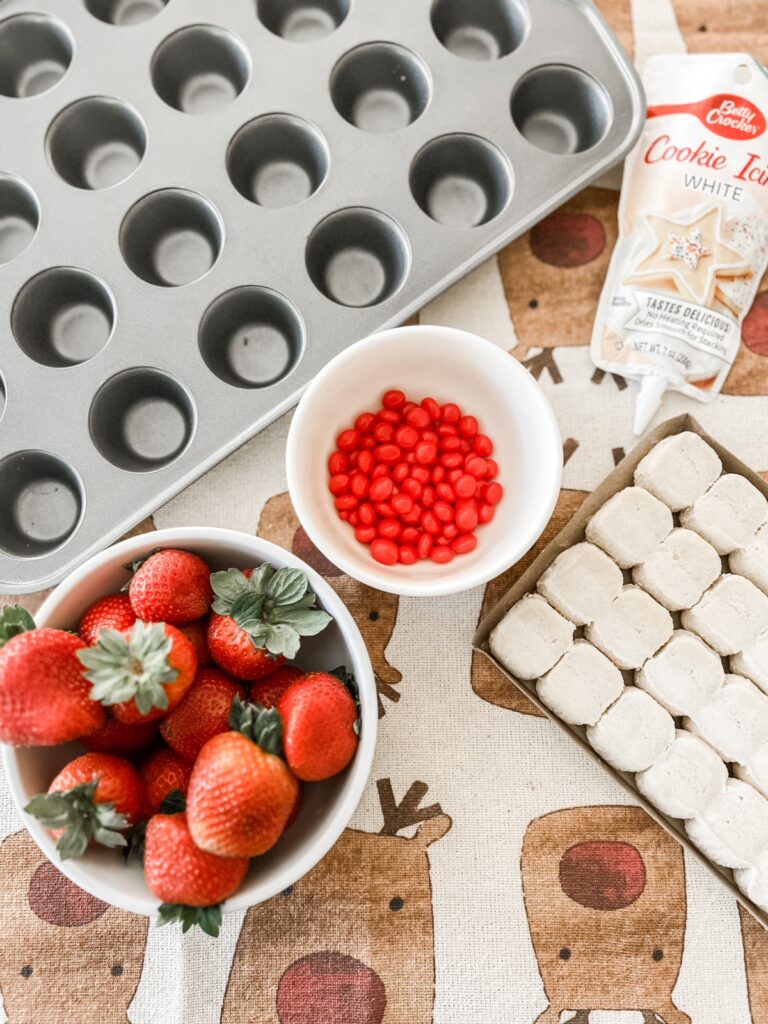
Hello and welcome to the blog!! Tis the season for all the holiday baking and treats! I just love baking fun treats doing the holidays. I saw these adorable sugar cookie gnomes on Pinterest and had to make them! They are cute, yummy and pretty easy to make. Here’s what you need:
Mini Muffin Pan
24 Pack Sugar Cookie Dough
Non Stick Spray
White Frosting
Strawberries
Red Hots
Tooth Pick
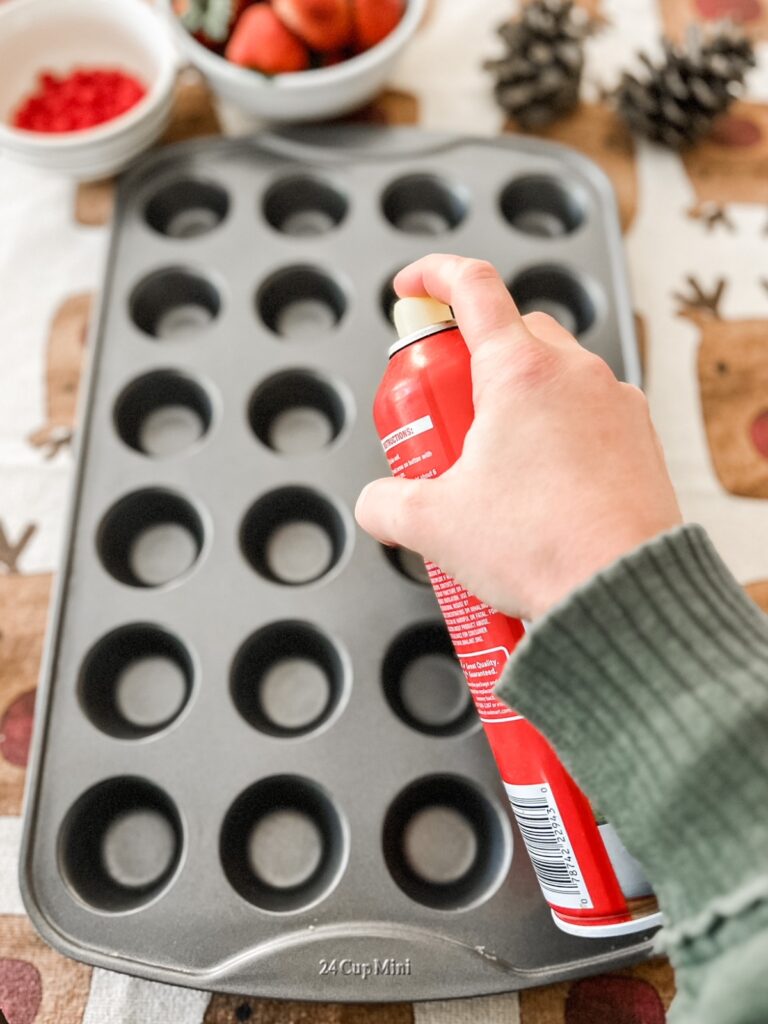
First, spray your mini tin with non stick spray very well. Really get the bottom of the tins because my bottoms stuck like crazy for some reason!
Next, place the sugar cookie dough in each of the muffin tins. I just used Pillsbury Sugar Cookie dough.
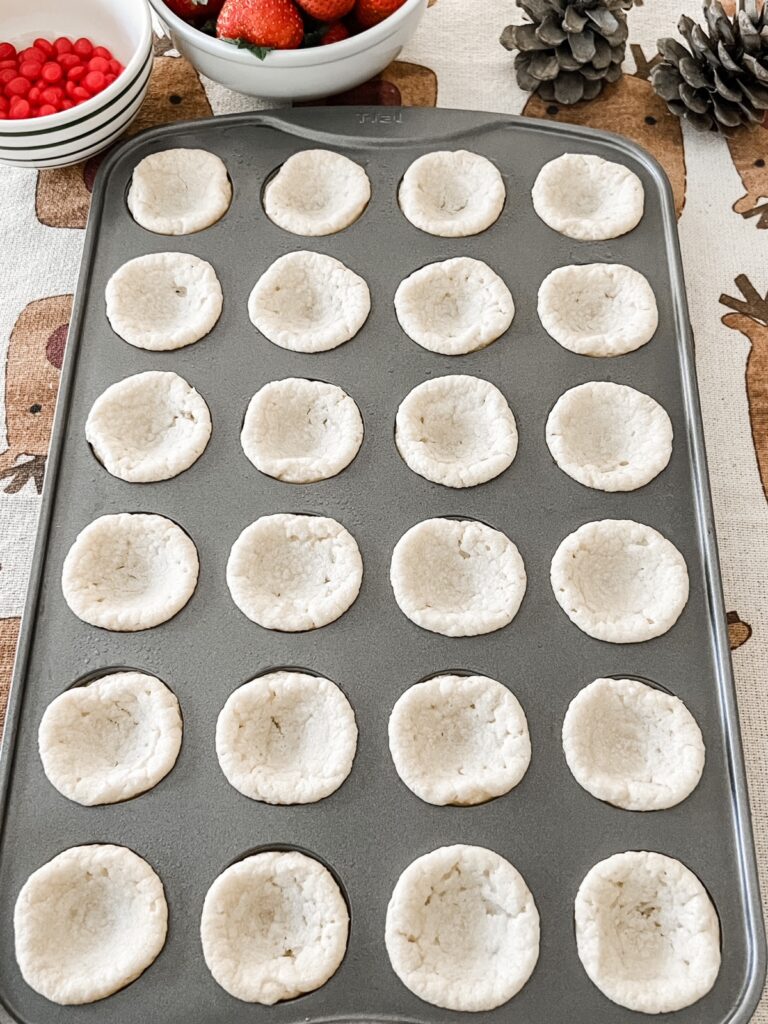
Cookie the dough according to the package directions. Once done, remove from oven and let cool a bit.
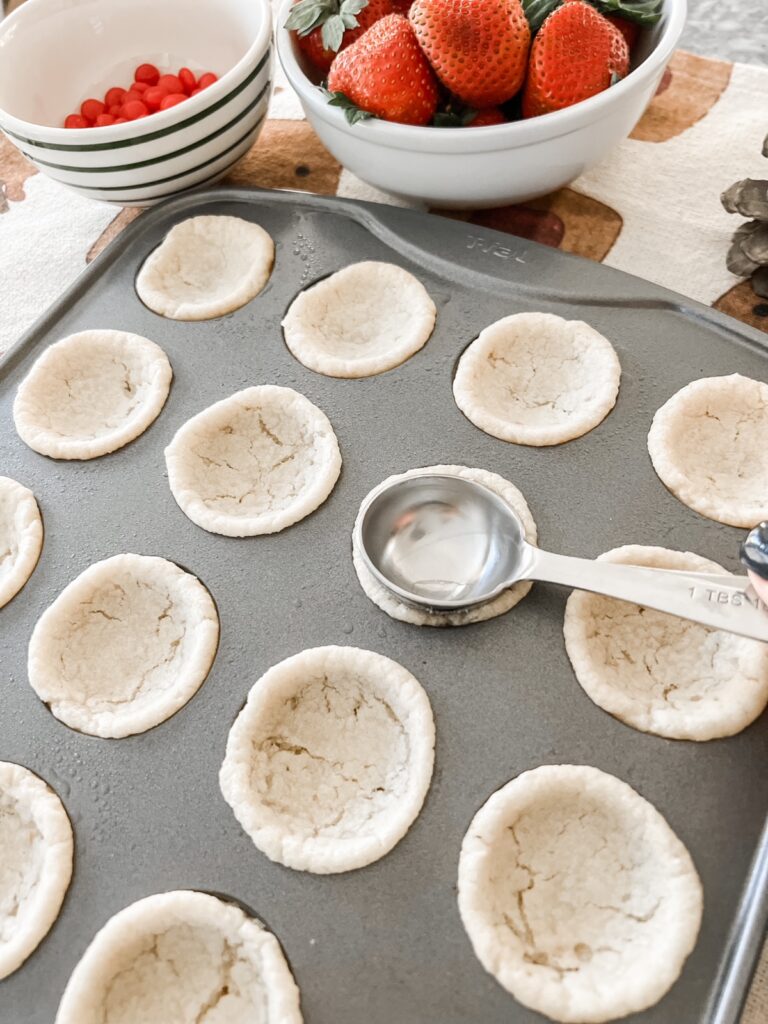
After the cookies have cooled for a bit, use a measuring cup to indent the center. My cookies were already sunk in so I didn’t need to push much. You just want an indent for the frosting sit in.
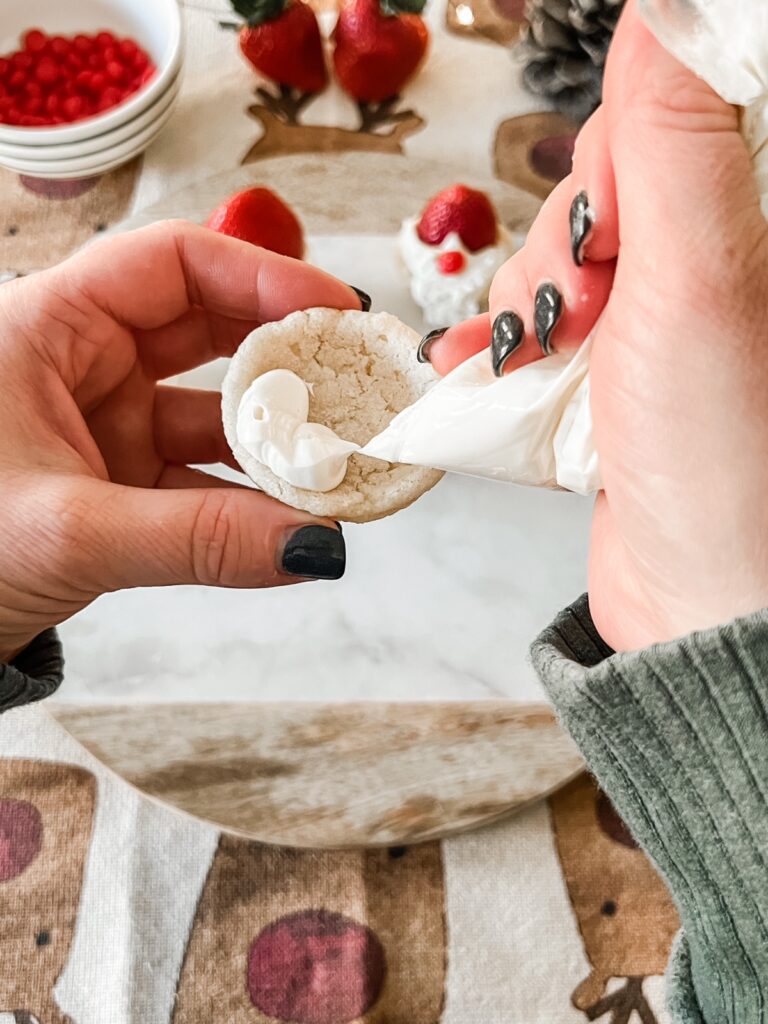
Remove the cookies from the tins and start putting frosting in them. I put my frosting in a baggie and cut a small hole in the corner, so it worked like a piping bag. Fill up the center of the cookie with the white frosting.
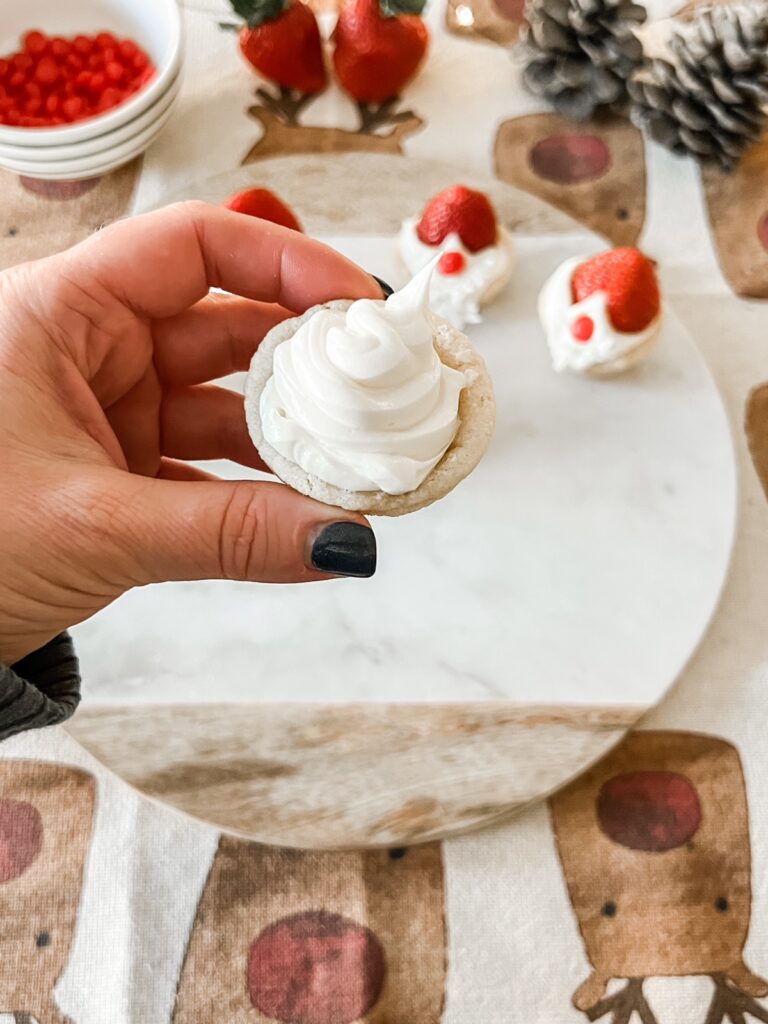
You want a decent amount of frosting. It’s going to be the beard of the gnome, so there needs to be enough to pull down the front.
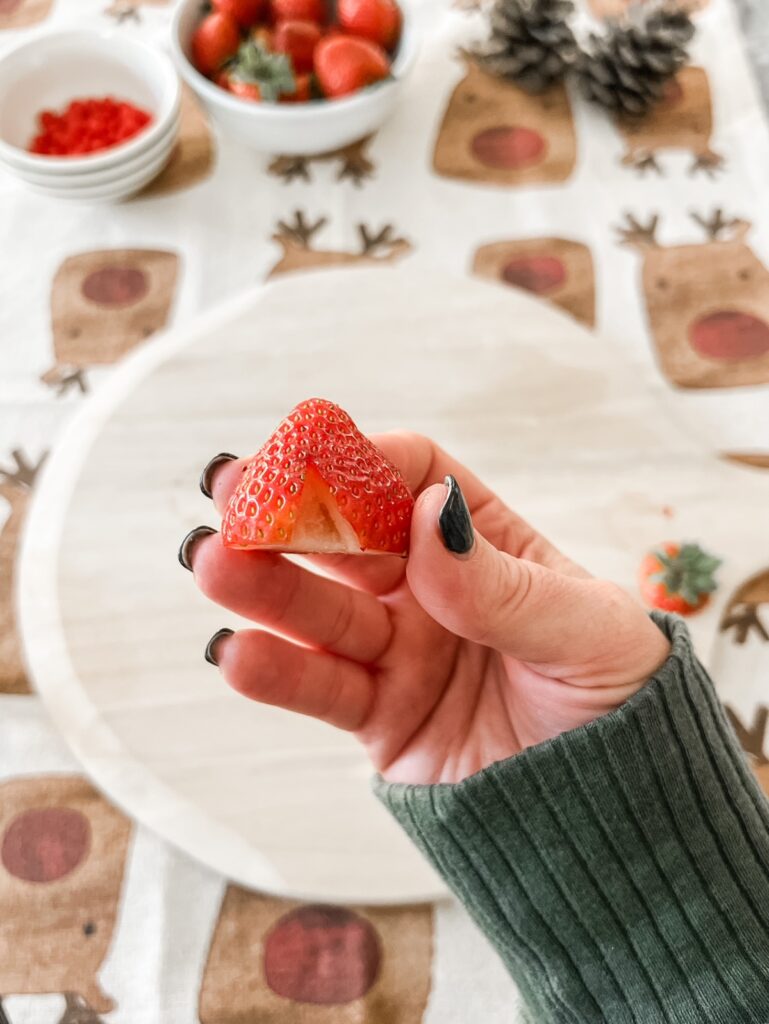
Use a pairing knife to cut off the stem and a little triangle in the front of the strawberry. This will be the gnome hat!
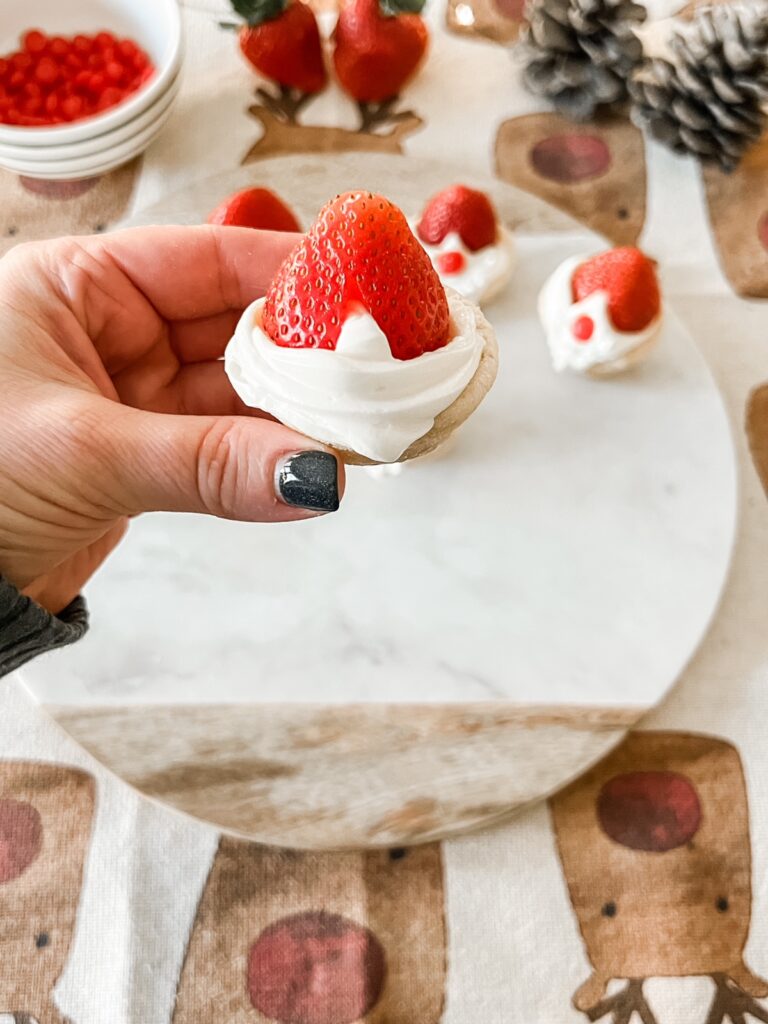
Place the cut strawberry onto the frosting.
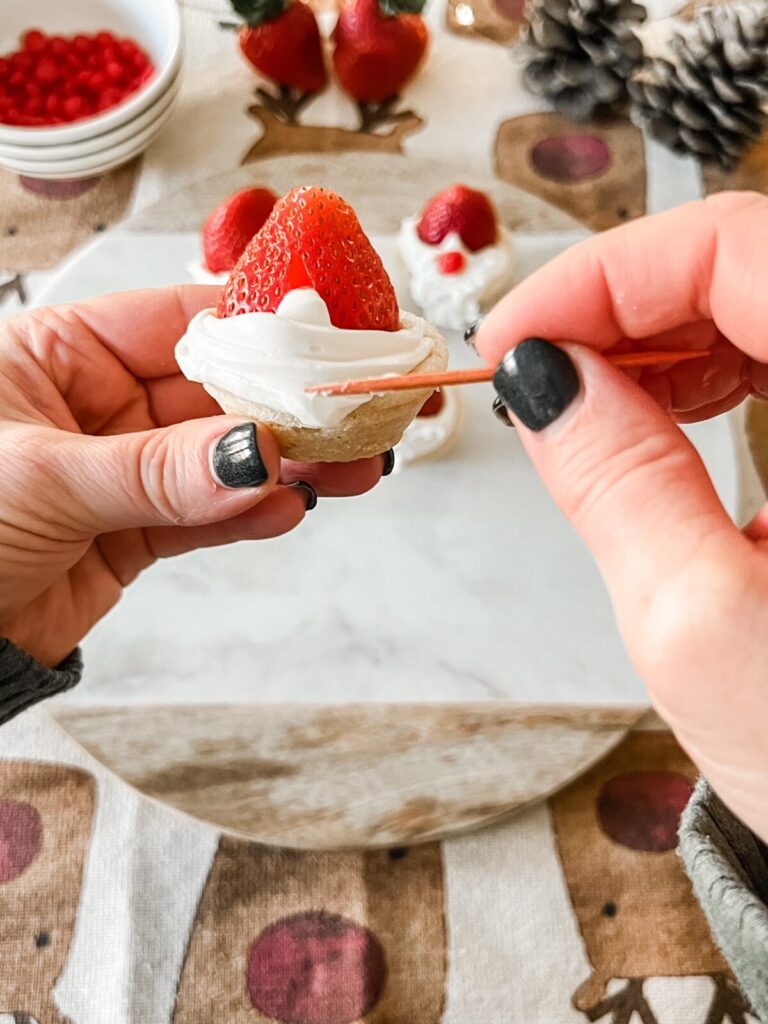
Use a toothpick to pull the frosting down the front to form the beard. I also used the toothpick to give the beard some texture to look like little hairs.
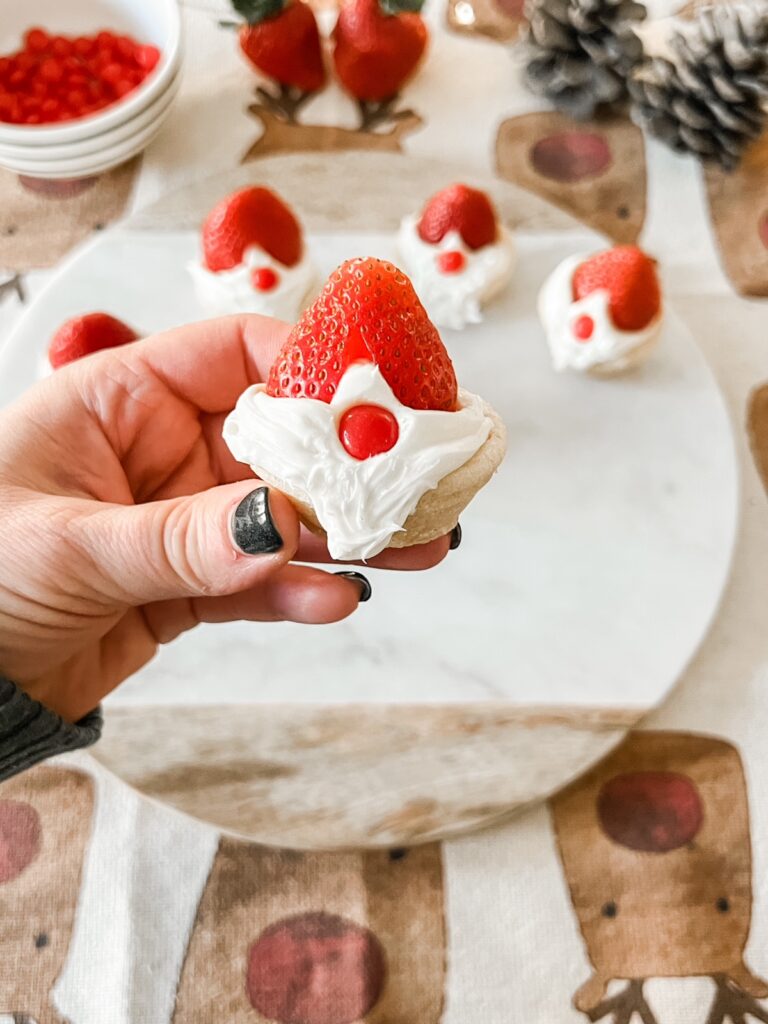
Place a red hot candy in the middle and now you have your cute little gnome! How stinking cute are these! I brought these with us camping and everyone loved them. Perfect for kids and adults. Also, a fun classroom treat or activity! Happy holidays and be sure to subscribe so you don’t miss a post!


These are adorable and sure to be a hit over the holidays! Thank you!